When 4K Has to Become 1080p Without Falling Apart
Downscaling is a resampling problem, not a checkbox
When I had to prepare Eamon Wyss’s Eagle Eye for a 1920x1080 delivery, the job was not simply “make it smaller.” That language is part of the problem. Scaling is a resampling decision. You are taking an existing image structure, discarding samples, and asking the result to retain coherence, texture, gradients, and edge behaviour after the fact.
That matters on any piece. It matters more on work like this.
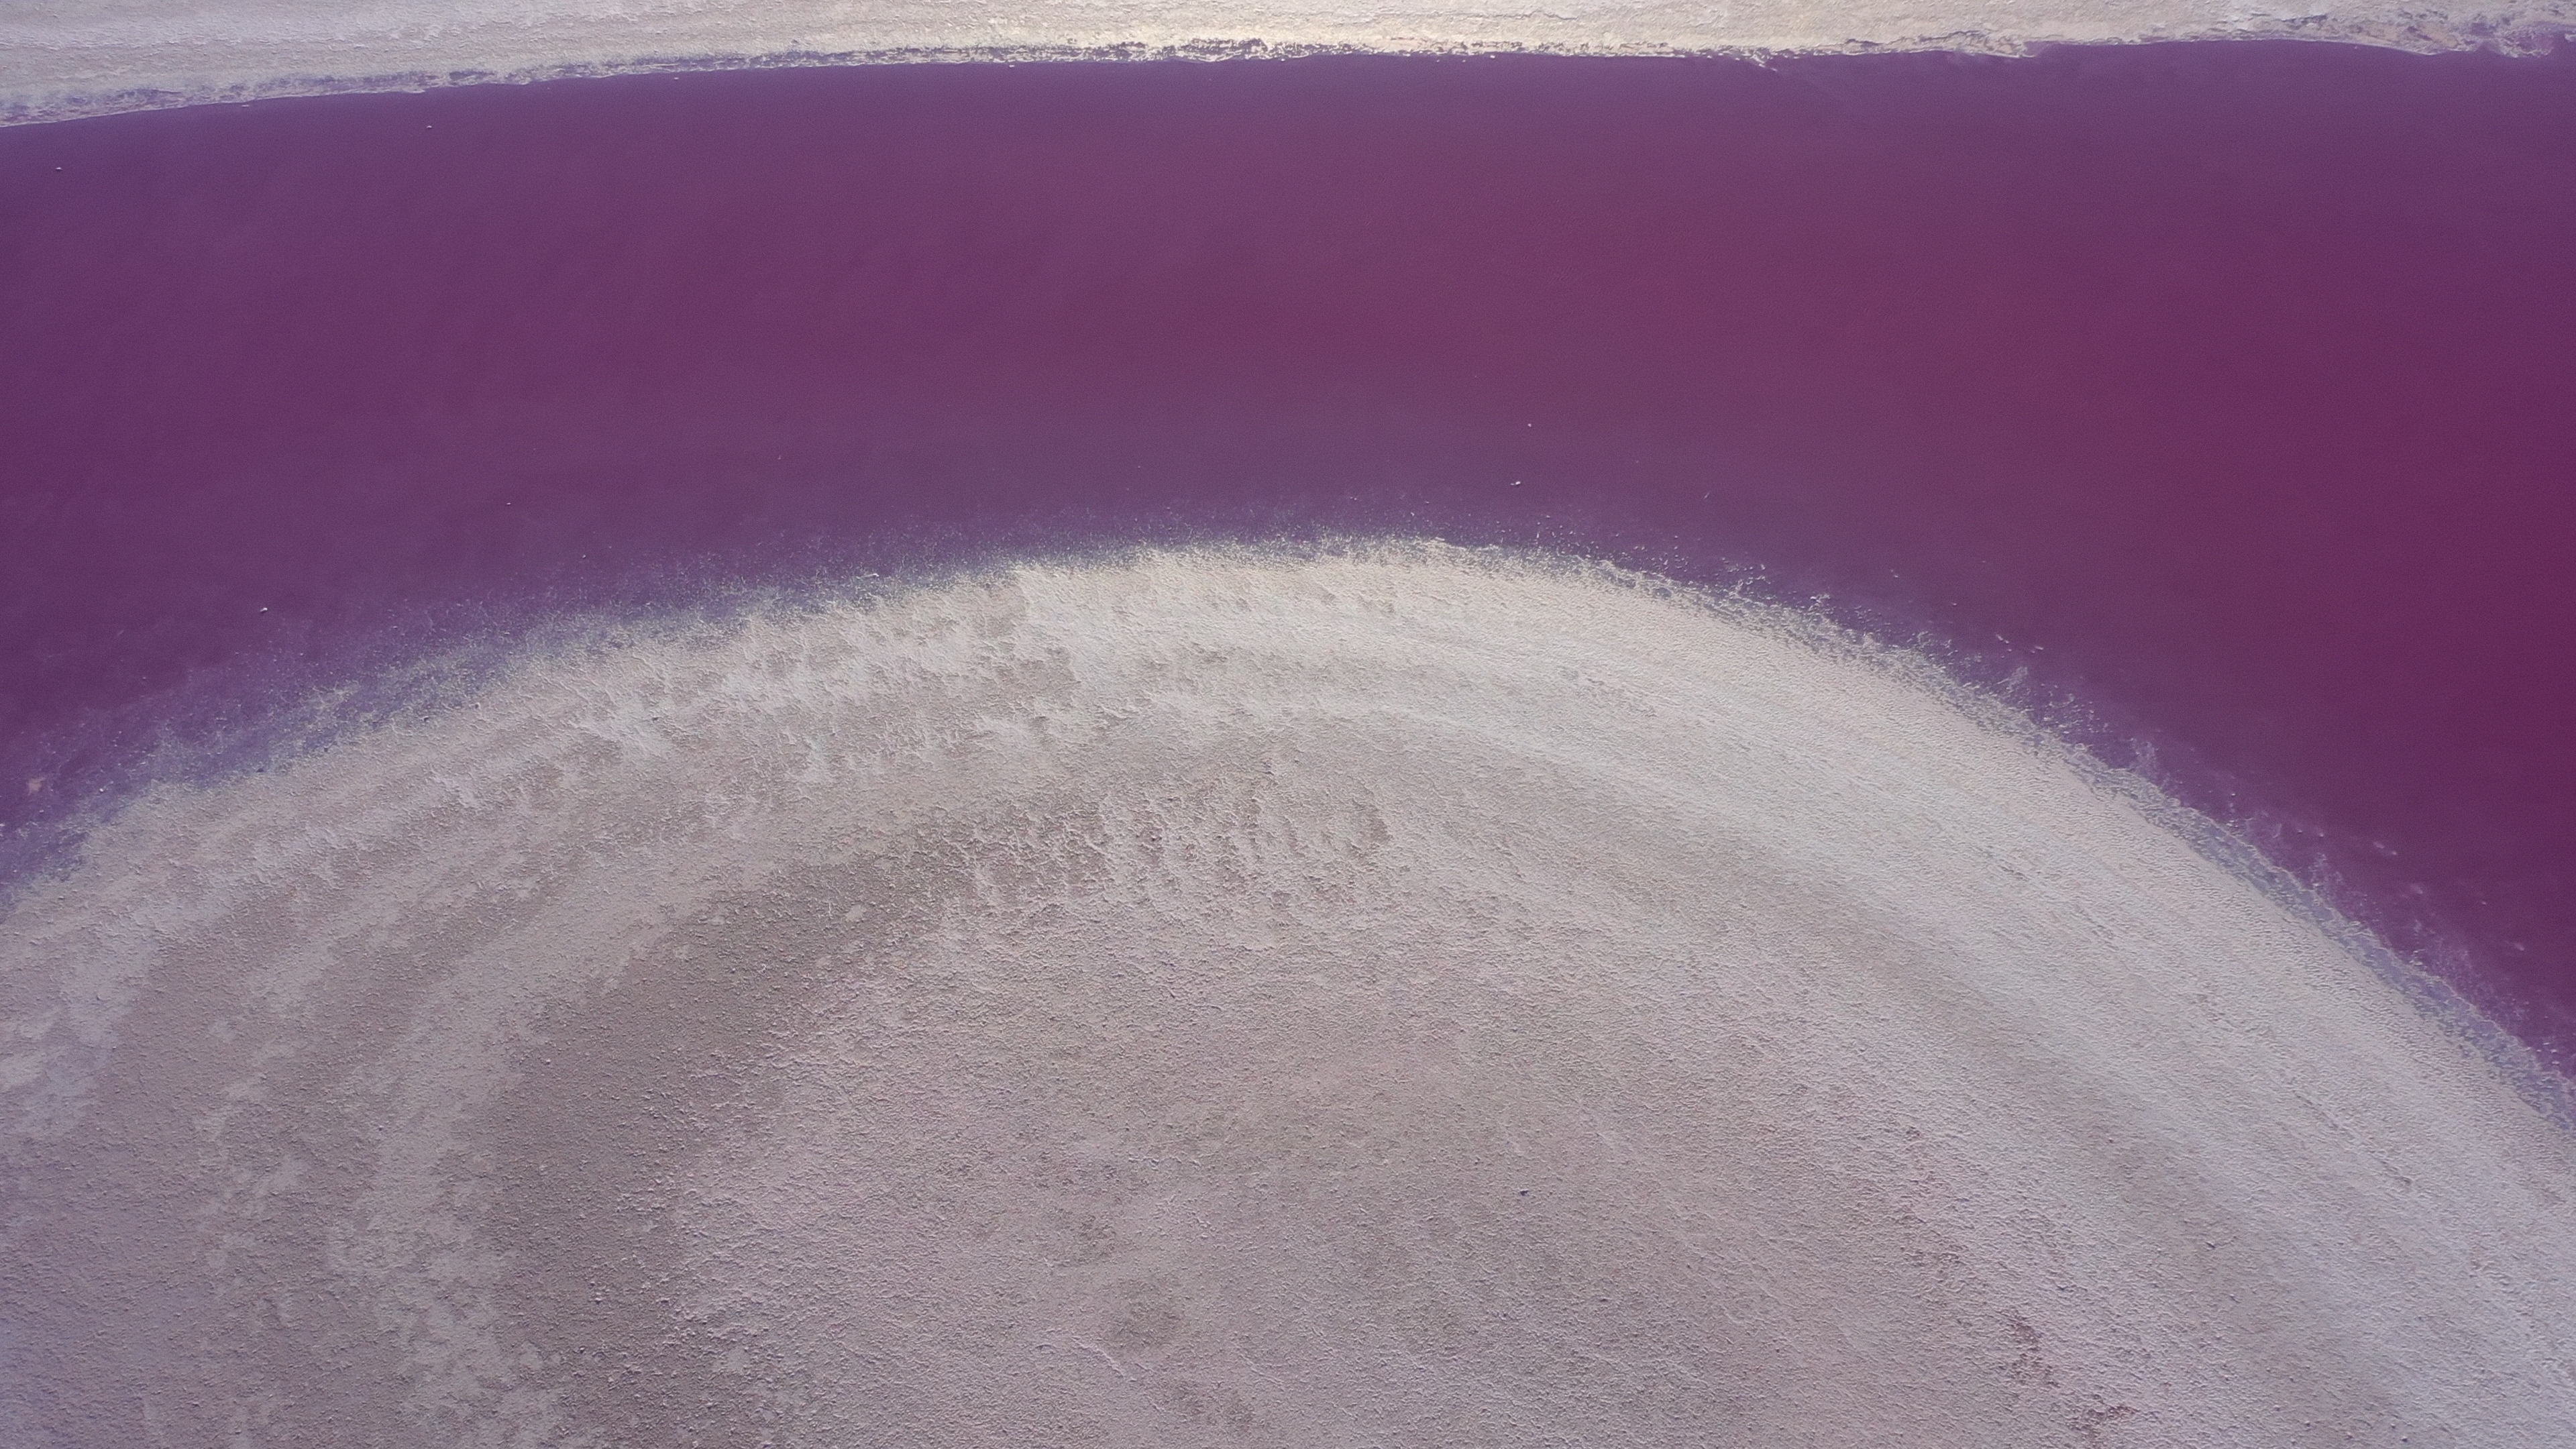
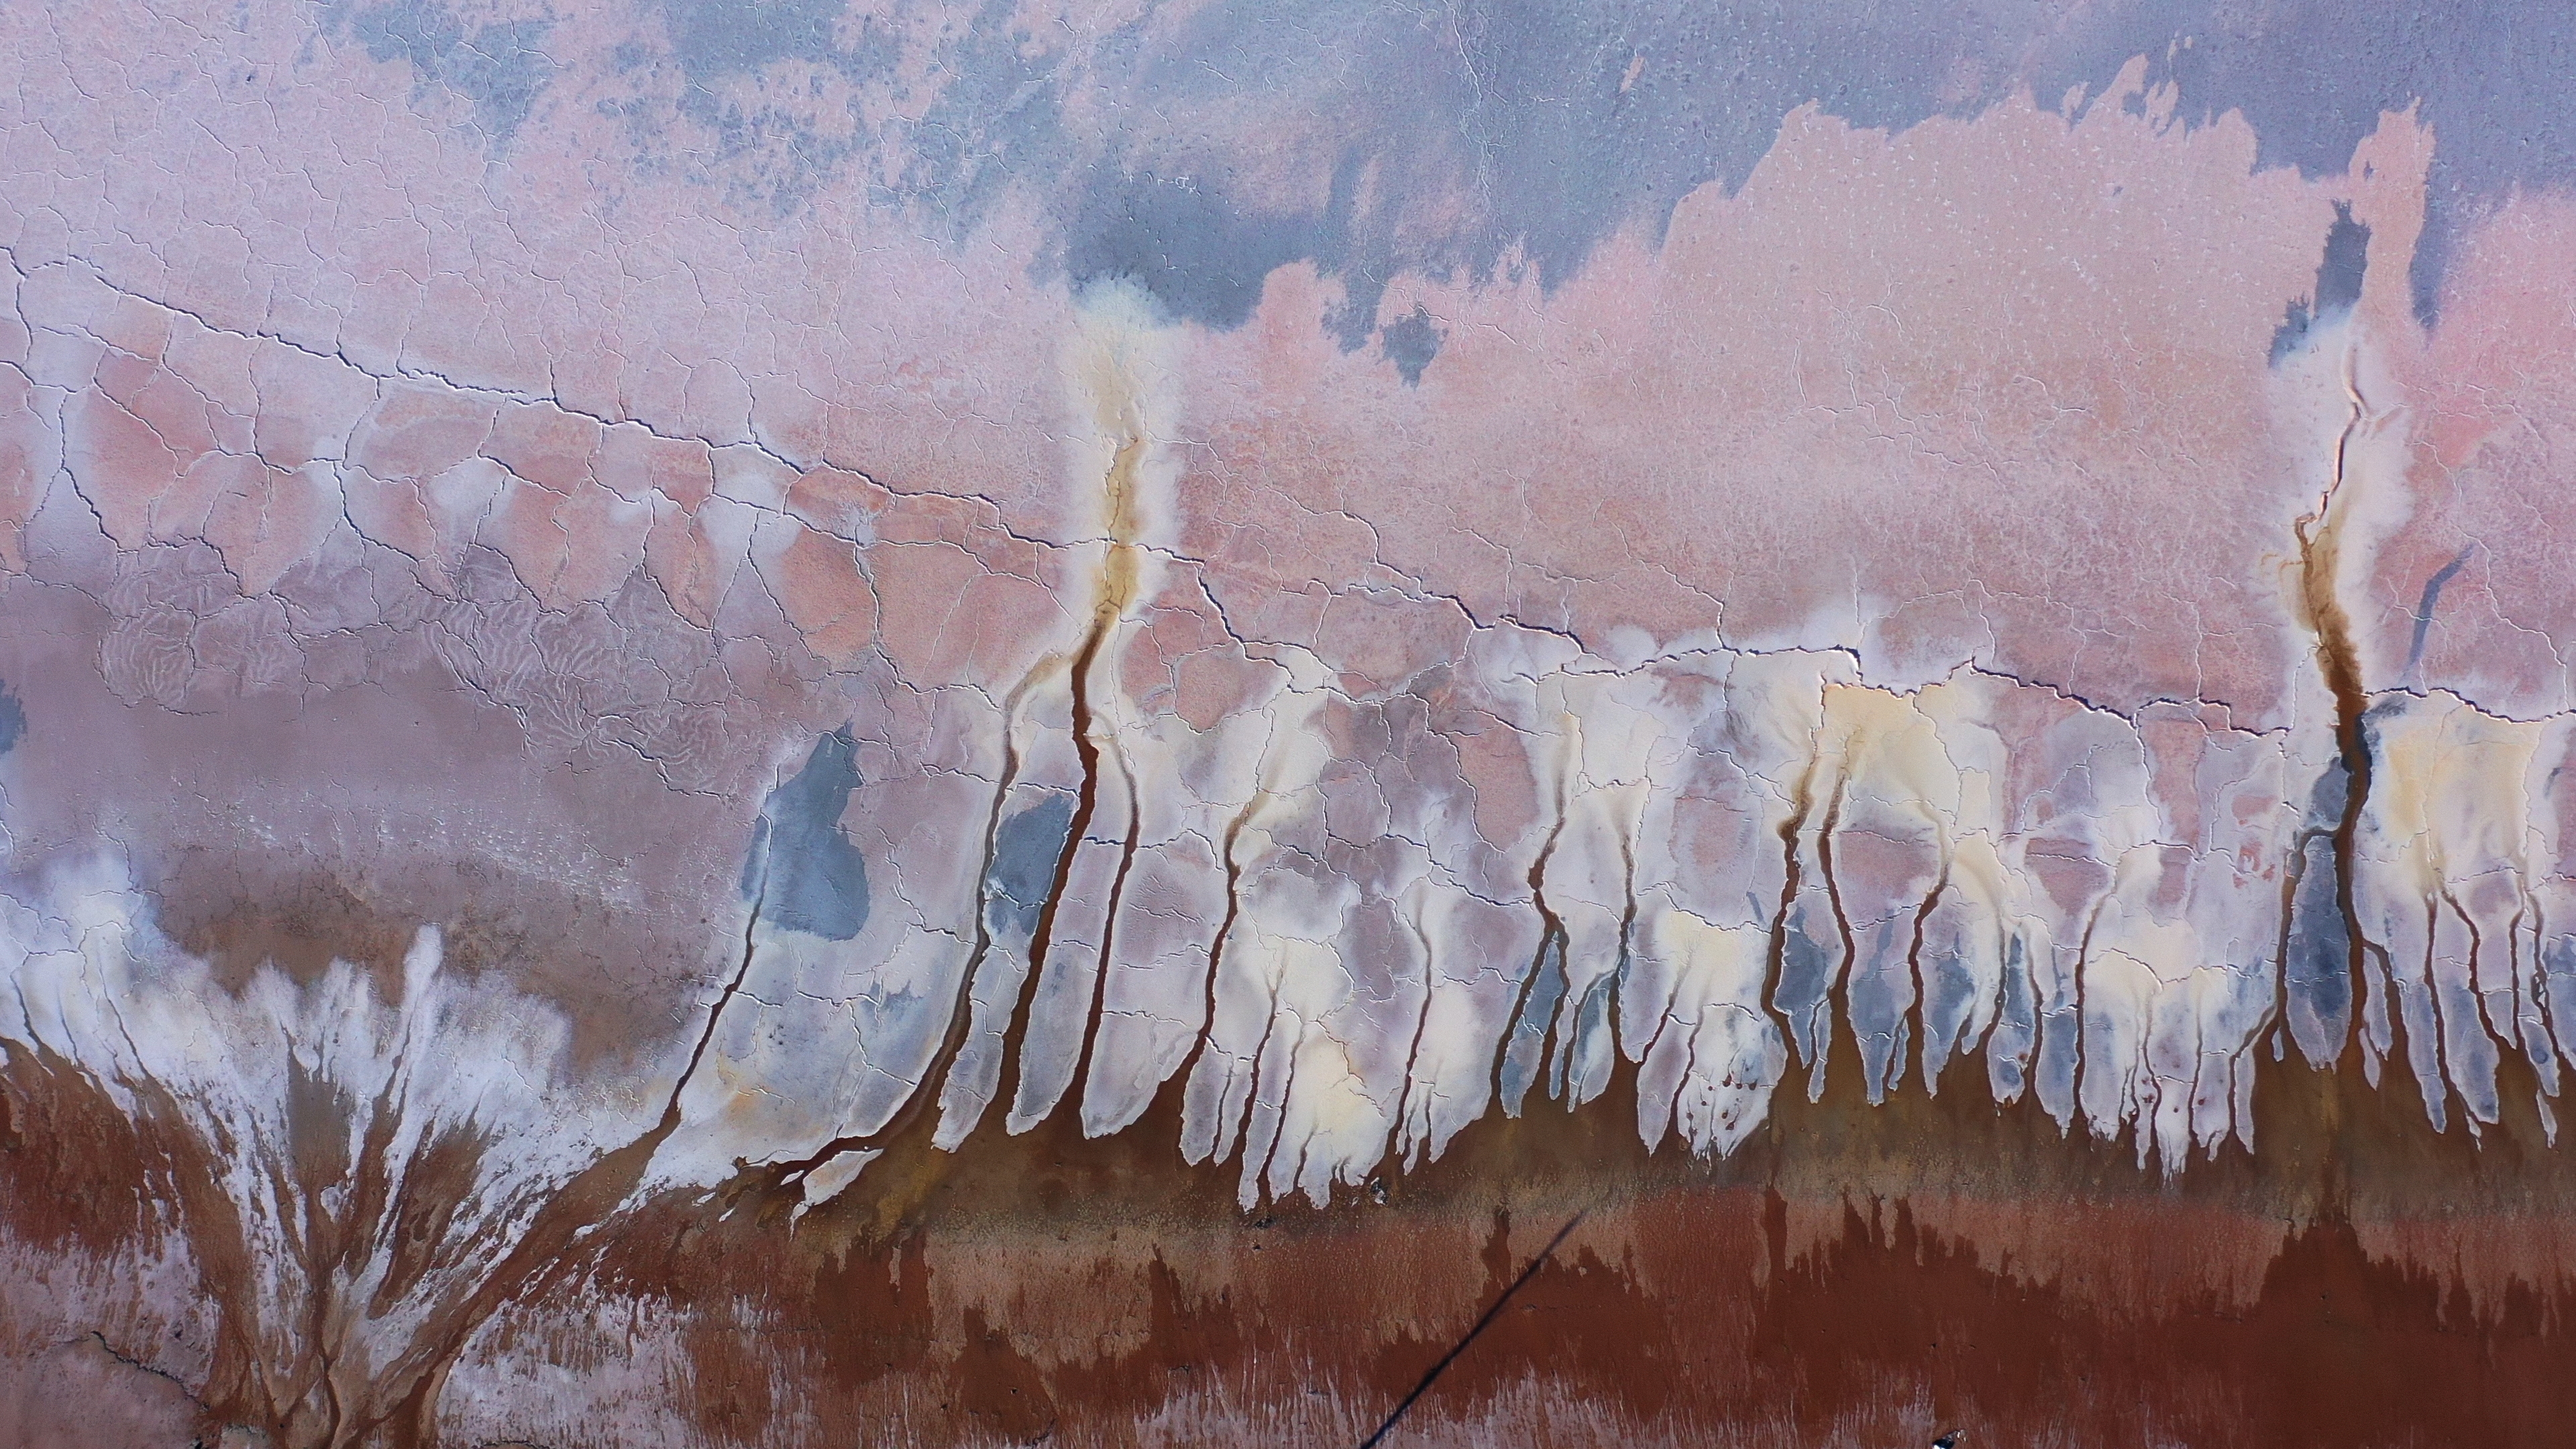
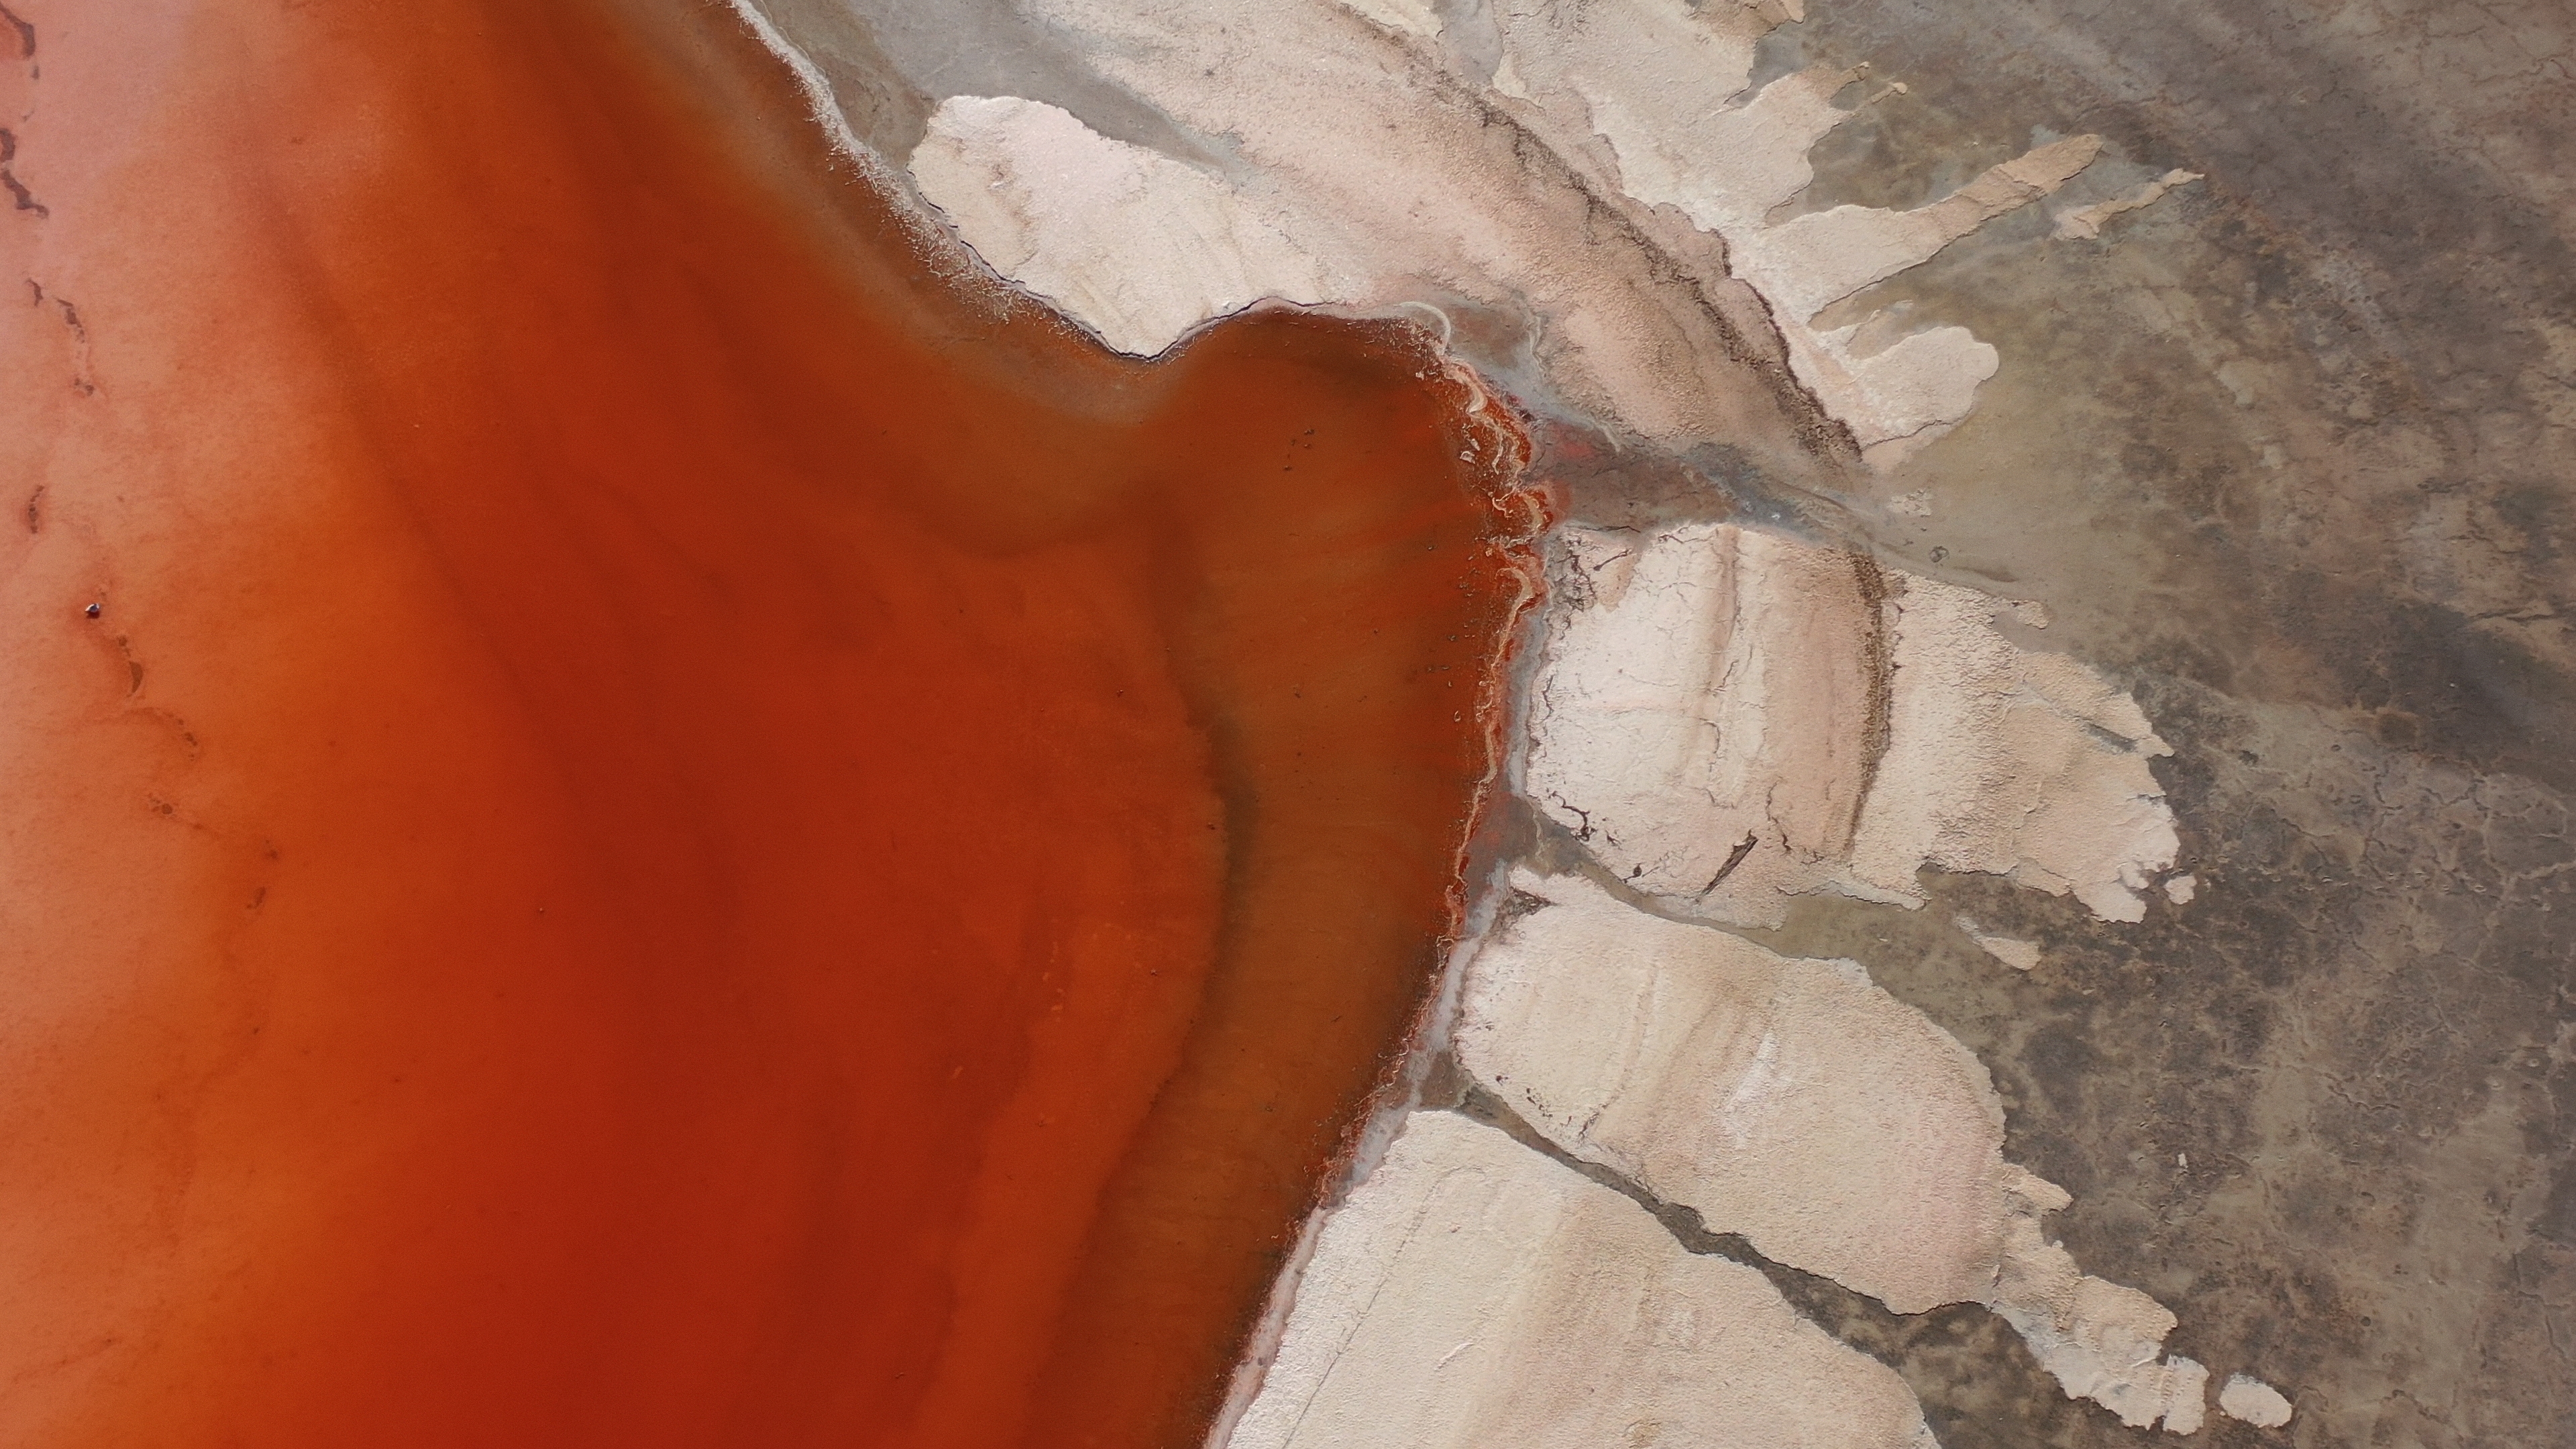
Eagle Eye is an intricate art project built from aerial imagery where the picture holds together because of subtle relationships: mineral textures, fine fracture lines, low-contrast detail, soft tonal transitions, and areas where colour sits close to texture rather than loudly announcing it. A careless downscale can flatten micro-contrast, introduce edge halos, smear delicate transitions, or make the image feel slightly plastic even when nothing looks obviously “broken.”
So I did not want to leave the 4K to 1080p step entirely to a default export path. I wanted direct control over the resampling algorithm, the colour metadata, and the mezzanine codec used for the 1080p master.
Why this kind of artwork exposes weak scaling fast
Some images survive rough scaling surprisingly well. Fast-moving handheld footage often hides a lot. Heavier texture, noise, and motion can mask small compromises. Eagle Eye is less forgiving.
The project contains exactly the kind of detail that punishes generic resizing:
- thin lines that can ring or break up
- gentle gradients that can step or dull
- broad colour fields where minor contamination becomes noticeable
- texture that depends on local separation rather than obvious sharpness
This is where the usual shortcut of “export straight from Resolve and trust the defaults” becomes less convincing.
To be clear, this project was graded in DaVinci Resolve Studio, which is absolutely production-safe and often sufficient for delivery. I use it happily. But sufficient is not the same thing as optimal for every specific resampling problem. If the delivery requirement is sensitive enough, external resampling with ffmpeg gives me a level of control that I prefer.
Why I did not treat the Resolve export as the final answer
Resolve Studio’s export path is designed to be practical, stable, and fast. That is the right priority most of the time. But it is still an abstraction. The scaling algorithm is one decision inside a much larger export pipeline, and the application is balancing many concerns at once: decode, transforms, render cache behaviour, output codec, colour management, and delivery presets.
For intricate artwork, I want to isolate the scaling step and make the intent explicit.
That means:
- choosing the resampler deliberately
- preserving a 10-bit pipeline in the output master
- writing explicit Rec.709 colour metadata
- outputting to a solid mezzanine codec rather than an aggressive distribution format
If I need a robust 1080p master for further review, archive, or downstream derivatives, that control is worth the extra step.
The ffmpeg workflow I adopted
My approach was straightforward. I started from the 4K source master and created a dedicated 1080p ProRes 422 HQ QuickTime export with ffmpeg, using zscale for the resize and spline36 as the resampling filter.
ffmpeg -i input.mov \
  -vf "zscale=width=1920:height=1080:filter=spline36:matrix=bt709:transfer=bt709:primaries=bt709" \
  -c:v prores_ks -profile:v 3 -pix_fmt yuv422p10le \
  -color_primaries bt709 -color_trc bt709 -colorspace bt709 \
  -c:a copy \
  output_1080p_proresHQ.mov
That command is not exotic. It is just explicit, which is the point.
What each part is doing
-vf "zscale=..."puts the resize insidezscale, which is backed by thezimglibrary and gives much finer control over resampling behaviour than a vague default path.width=1920:height=1080defines the exact target raster.filter=spline36selects the kernel used for the downscale. I like it because it tends to preserve fine structure cleanly without leaning too hard into artificial crispness.matrix=bt709:transfer=bt709:primaries=bt709keeps the transform assumptions aligned with an HD Rec.709 delivery.-c:v prores_ksuses the ProRes encoder inffmpegthat gives dependable profile control.-profile:v 3selects ProRes 422 HQ.-pix_fmt yuv422p10lewrites a 10-bit 4:2:2 file, which is appropriate for a high-quality mezzanine master.-color_primaries bt709 -color_trc bt709 -colorspace bt709writes explicit colour metadata so the file is less likely to be interpreted ambiguously later.-c:a copyleaves the audio untouched instead of inventing another transcode.
None of that is glamorous. It is just disciplined.
Why zscale and why spline36
The most important choice here is not ProRes. It is the resampler.
zscale matters because it gives me a controlled, high-quality resizing path with predictable behaviour. If the job is visually sensitive, I would rather use a tool where the resampling stage is the central operation, not a side effect buried inside an export preset.
spline36 is the filter choice I settled on for this downscale because it sits in a useful middle ground. It preserves edge definition and fine texture better than softer options, but it does not lean as aggressively into ringing as some sharper kernels can. With artwork like Eagle Eye, that balance matters. I am trying to keep small structures legible without creating a false sense of sharpness around them.
This is also where a lot of casual conversation around scaling goes off track. People talk about “sharp” as if it were a universal good. It is not. Bad sharpening and bad resampling can both produce something that looks more “defined” at first glance while actually damaging the image. What I want is structural clarity, not edge hype.
Why 10-bit and ProRes 422 HQ still matter at 1080p
A 1920x1080 master does not stop benefiting from a 10-bit pipeline just because the raster is smaller.
This piece contains gradients, restrained tonal transitions, and chroma relationships that can look thinner than they should if the export path becomes too compressed or too distribution-oriented too early. Keeping the 1080p master in ProRes 422 HQ gives me a stable mezzanine file that is easy to archive, inspect, and derive further deliverables from.
yuv422p10le matters for the same reason. It means:
- 10-bit precision instead of an 8-bit pipeline
- 4:2:2 chroma sampling instead of 4:2:0
- a broadly compatible professional format for post workflows
That does not mean the file is lossless. It is not. It means the compromises are sensible for this stage of the pipeline.
ProRes 422 HQ was the right profile choice here because I wanted a robust intermediate that preserved image integrity without turning the 1080p master into an unnecessarily exotic file. For review copies, web encodes, or platform-specific exports, I can derive lighter versions later. The master should stay conservative.
Colour management and explicit Rec.709 tagging
Colour problems do not always announce themselves dramatically. Sometimes they arrive as a file that looks slightly wrong in one player, slightly different in another, and “mostly fine” in the application that created it. That is exactly the kind of ambiguity I try to avoid.
Because this output was intended as a 1080p Rec.709 master, I explicitly tagged the file with bt709 primaries, transfer, and colourspace metadata. That does not replace proper colour management upstream, but it does reduce the chances of a downstream application making bad assumptions.
If your pipeline already lives in a disciplined colour workflow, this is simply extending that discipline into delivery. If it does not, metadata is often where avoidable confusion starts.
Practical difference versus a default export
I am not claiming laboratory measurements or a miraculous transformation. That would be fake precision. What I am saying is more practical.
When artwork is this sensitive, I would rather trust a controlled resampling step than a generic export preset. The difference is usually not theatrical. It is cumulative. Texture holds together a little better. Gradients stay calmer. Fine lines feel less strained. The image survives the reduction with less editorial violence.
That is often the real test in post-production. Not whether a change is dramatic, but whether it avoids unnecessary damage.
Resolve Studio remained the grading environment for the project. But for this specific 4K to 1080p downscale, ffmpeg with zscale and spline36 gave me the kind of explicit control I wanted over resampling, colour metadata, and the final mezzanine file.
Conclusion
The lesson here is simple: downscaling deserves the same seriousness as grading, encoding, or conform when the image is delicate enough.
If the source is dense with fine structure, gradients, and quiet texture, the resize step is not administrative. It is interpretive. A bad downscale can make a carefully built image feel coarser than it really is.
For Eagle Eye, the right answer was a controlled 4K to 1080p resample through ffmpeg, zscale, spline36, ProRes 422 HQ, yuv422p10le, and explicit bt709 tagging. Not because the default tools are useless, but because this was the kind of job where a little skepticism toward defaults was justified.
That skepticism is healthy in post. The image usually benefits from it.